Hey there! I'm a supplier of ceramic ball bearings, and I've seen a lot of folks scratching their heads over how to replace these little wonders. So, I thought I'd put together a blog to walk you through the process step by step. Whether you're a DIY enthusiast or a professional mechanic, this guide should help you out.
Why Replace Ceramic Ball Bearings?
First off, you might be wondering why you'd even need to replace ceramic ball bearings. Well, like any mechanical part, they can wear out over time. The reasons could vary from normal wear and tear, exposure to harsh conditions, or just plain old misuse. When they start to go bad, you might notice a few signs. There could be strange noises coming from the machinery, like a grinding or clicking sound. The equipment might also start to vibrate more than usual, or it could become less efficient.
Ceramic ball bearings have a lot of advantages over their steel counterparts. They're lighter, harder, and more resistant to corrosion. They also generate less heat and friction, which can lead to longer equipment life and better performance. But even with all these benefits, they're not invincible.
Types of Ceramic Ball Bearings
Before we dive into the replacement process, let's talk a bit about the different types of ceramic ball bearings. There are a few main ones that you'll come across:
- Zirconia Bearings: These bearings are known for their high toughness and good wear resistance. They can handle a fair amount of stress and are often used in applications where reliability is key. You can learn more about them here.
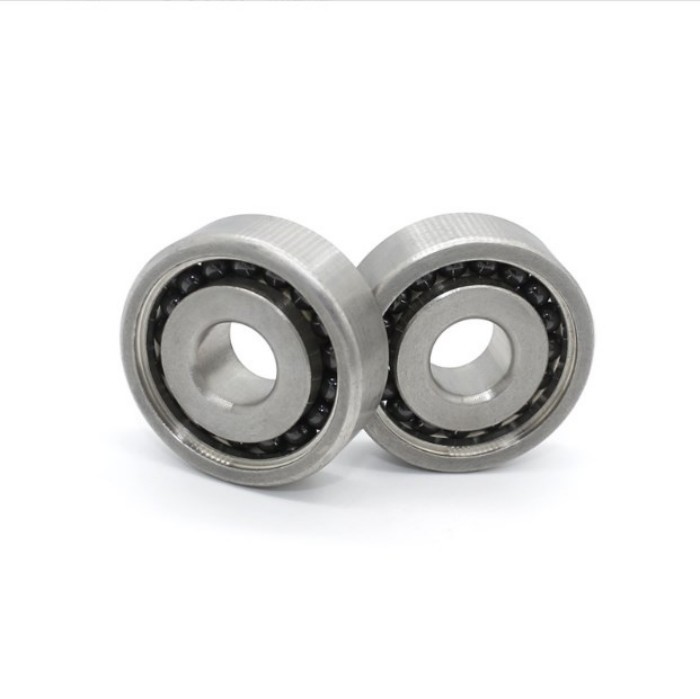
- Hybrid Ceramic Bearings: As the name suggests, these are a mix of ceramic balls and steel races. They combine the best of both worlds, offering the low friction of ceramic balls with the strength and durability of steel races. Check out this page for more details.
- Silicon Nitride Bearings: These bearings are extremely hard and have excellent thermal stability. They're great for high-speed applications where heat and wear are major concerns. Find out more about them here.
Tools You'll Need
Now that you know a bit about the types of ceramic ball bearings, let's talk about the tools you'll need to replace them. Here's a basic list:
- Wrenches: You'll need the right size wrenches to remove and install the bearing housing. Make sure you have both open-end and socket wrenches on hand.
- Pliers: Needle-nose pliers can come in handy for removing small parts and clips.
- Bearing Puller: This is a specialized tool that's used to remove the old bearing from the shaft. It's a must-have if you want to avoid damaging the shaft.
- Hammer and Drift Punch: These are used to gently tap the new bearing into place. Just make sure you use a soft-faced hammer to avoid damaging the bearing.
- Grease: You'll need some high-quality grease to lubricate the new bearing. Make sure you choose a grease that's compatible with the type of ceramic ball bearing you're using.
- Cleaning Solvent: You'll need to clean the bearing housing and shaft before installing the new bearing. A good cleaning solvent will help remove any dirt, debris, or old grease.
Step-by-Step Replacement Process
Now that you have all the tools you need, let's get started with the replacement process. Here's a step-by-step guide:

Step 1: Safety First
Before you start working on any machinery, make sure you take all the necessary safety precautions. Turn off the power to the equipment and lock out the switch to prevent it from accidentally turning on. Wear safety glasses and gloves to protect yourself from any flying debris or sharp edges.
Step 2: Remove the Old Bearing
- First, use the wrenches to remove the bearing housing from the equipment. Be careful not to lose any of the small parts or bolts.
- Once the housing is removed, use the bearing puller to remove the old bearing from the shaft. Make sure you follow the manufacturer's instructions for using the puller to avoid damaging the shaft.
- If the bearing is stuck, you can try using a little bit of heat to expand the metal. Just be careful not to overheat the shaft or the bearing housing. You can use a heat gun or a torch, but make sure you keep the heat moving and don't focus it in one spot for too long.
Step 3: Clean the Shaft and Housing
- Once the old bearing is removed, use the cleaning solvent to clean the shaft and the bearing housing. Make sure you remove all the dirt, debris, and old grease. You can use a brush or a rag to help you clean.
- Inspect the shaft and the housing for any signs of damage or wear. If you notice any cracks, dents, or excessive wear, you may need to replace the shaft or the housing before installing the new bearing.
Step 4: Install the New Bearing
- Before you install the new bearing, make sure you lubricate it with the grease. Apply a thin layer of grease to the balls and the raceways of the bearing.
- Carefully place the new bearing on the shaft. Make sure it's properly aligned and seated. You can use the hammer and drift punch to gently tap the bearing into place, but be careful not to hit it too hard.
- Once the bearing is in place, you can reinstall the bearing housing. Make sure you tighten the bolts to the recommended torque. You can use a torque wrench to ensure you're tightening the bolts to the correct level.
Step 5: Test the Equipment
- Once the new bearing is installed, turn on the power to the equipment and test it. Listen for any strange noises or vibrations. If everything sounds and feels okay, you're good to go. If you notice any problems, you may need to double-check the installation or look for other issues.
Tips and Tricks
Here are a few tips and tricks to make the replacement process go smoothly:
- Keep it Clean: Make sure you work in a clean environment to avoid getting any dirt or debris in the new bearing. Use a clean workbench and keep your tools clean.
- Follow the Manufacturer's Instructions: Always follow the manufacturer's instructions for installing the new bearing. This will ensure that it's installed correctly and will work properly.
- Inspect the Bearing: Before you install the new bearing, inspect it for any signs of damage or defects. If you notice any problems, contact the supplier to get a replacement.
Conclusion
Replacing ceramic ball bearings might seem like a daunting task, but with the right tools and a little bit of know-how, you can do it yourself. Remember to take your time, follow the steps carefully, and always prioritize safety. If you have any questions or need more information, don't hesitate to reach out. As a ceramic ball bearings supplier, I'm here to help you with all your bearing needs. Whether you're looking for more information about different types of bearings or you're ready to place an order, feel free to contact me for a detailed discussion and a great deal.
References
- General knowledge from years of working with ceramic ball bearings
- Manufacturer's manuals and technical documents for ceramic ball bearings


